 English
 Español
 عربي
عربي  Pусский
 Sep 15, 2026
Visit:5
Sep 15, 2026
Visit:5
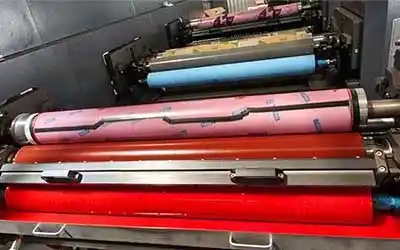
Solvent-based ink viscosity is the single most influential variable in flexographic printing. It directly governs how much ink transfers from the anilox roll to the plate, how evenly that ink lays down on the substrate, and how quickly the printed film dries. Get it wrong in either direction — too thin or too thick — and you will see it immediately in print quality, ink consumption, and press downtime.
This guide walks through the measurement method, typical starting ranges, and the practical adjustments operators need to make during a production run.
In a flexographic inking system, the metered ink film thickness is primarily a function of viscosity. The more viscous the ink, the thicker the film that transfers to the substrate — and the less web length you can print with a given volume of ink.
When viscosity runs too low, the ink becomes extremely mobile. It fills in fine reverse areas, causes halftone dots to grow, and produces weak, washed-out color. When viscosity runs too high, the opposite happens: fine reverses plug, ink consumption spikes, and the printed film may dry unevenly or fail to adhere properly. At the extreme, excessively reduced viscosity can destroy the binder system entirely, leading to adhesion failure and flaking.
For solvent-based inks specifically, there is an additional complication: solvents evaporate continuously during the run, causing viscosity to creep upward. Without regular monitoring and correction, a job that starts on-spec can drift out of range within an hour.
The industry-standard field measurement for flexographic ink viscosity is the efflux cup — most commonly the Zahn cup. It is a stainless steel, bullet-shaped cup with a precision-drilled orifice in the bottom and a 12-inch handle for dipping.
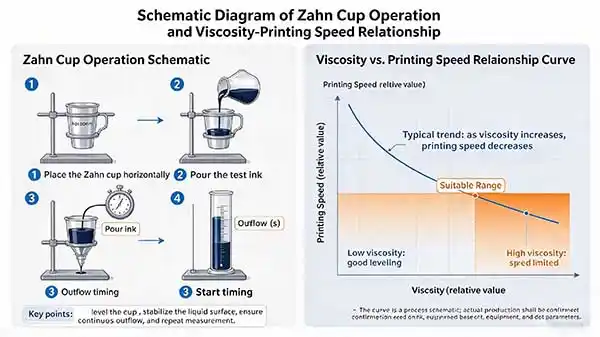
For flexographic applications, the Zahn #2 cup is the most widely used size. The Shell #3 and DIN #4 cups are also common alternatives. The principle is simple: fill the cup with ink, lift it out, and time how long the ink takes to drain through the orifice. The result is expressed in seconds.
Bring the ink to working temperature. Viscosity is temperature-dependent, so measure at the actual press temperature, typically around 25°C.
Stir or recirculate the ink. Some solvent inks are thixotropic and develop a “false body.” Circulate for at least 10 minutes before measuring.
Submerge the Zahn cup completely into the ink at an angle, allowing it to fill without trapping air.
Lift the cup vertically and start the stopwatch the moment the cup breaks the surface.
Watch the stream flowing from the bottom orifice. Stop the timer at the first break in the continuous stream, roughly 6 mm below the cup.
Record the elapsed time in seconds as the viscosity reading.
Clean the cup immediately after each measurement. Dirty or damaged cups produce inaccurate readings.
Consistency matters more than absolute precision. Always use the same cup for a given color, because even cups of the same design can vary slightly from one another.
There is no universal viscosity number that works for every solvent-based flexo job. The target depends on press speed, anilox volume, substrate, and the ink formulation itself. However, the following ranges serve as reliable starting points:
| Application | Zahn Cup | Typical Range |
|---|---|---|
| General solvent flexo (per patents/technical data) | Zahn #2 | 15–30 seconds |
| Flexible packaging, solvent-based | Zahn #2 | 22–26 seconds |
| General flexo, Zahn #3 reference | Zahn #3 | 18–30 seconds |
| Whites and overprint lacquers | Zahn #2 | ~30 seconds |
The 15–30 second range on a Zahn #2 cup covers a broad spectrum of flexographic work, with 20 seconds being a classic mid-point reference. For flexible packaging applications specifically, 22–26 seconds on a #2 Zahn cup is a widely used starting window. White inks and overprint varnishes often run higher — around 30 seconds — because they need greater film thickness for opacity or gloss.
Critical caveat: These are starting points, not specifications. Your ink supplier's recommended range for the specific product you are running takes precedence. Always confirm the target viscosity against the supplier's technical data sheet before making adjustments on press.
The defining challenge of solvent-based flexo is that viscosity does not stay put. As the press runs, solvent evaporates from the ink film, from the fountain, and from the recirculation system. The result is a steady increase in viscosity that must be countered by adding fresh solvent.
Manual adjustment is the traditional approach: the operator measures viscosity every 30 minutes, compares the reading to the target, and adds a measured amount of the recommended diluent. The ink is then recirculated and re-measured before the next reading is taken. The skill here lies in judging how much solvent to add — too little and you will be chasing the target all shift; too much and you overshoot into the low-viscosity zone, which brings its own set of defects.
Automatic viscosity controllers remove much of that guesswork. These systems continuously monitor ink viscosity in the recirculation line and add solvent on demand to hold the set point within a tight tolerance. For long runs or high-speed presses where manual measurement intervals are too coarse, an automatic controller is effectively a requirement for consistent color and ink mileage.
One important note on temperature: on a running flexo press, ink temperature tends to rise due to friction from the doctor blade, the anilox roll, and the ink pump. Counterintuitively, this does not simply thin the ink — solvent evaporates faster at higher temperatures, so the net effect is often an increase in viscosity that requires even more solvent top-up. This is why temperature control and viscosity control are complementary systems, not substitutes for one another.
Four variables determine where your target viscosity should sit:
Press speed. Higher press speeds require lower viscosity to ensure the ink transfers cleanly from the anilox cells to the plate and then to the substrate within the brief contact time available. At low speeds, a slightly higher viscosity can be tolerated and may even improve color strength.
Anilox volume (BCM). A high-BCM anilox roll carries more ink, which means the ink needs to release cleanly from deeper cells. Higher-viscosity ink resists release from anilox cells, so high-volume rolls generally pair better with slightly lower viscosity. Conversely, a low-BCM roll used with too-thin ink may not carry enough pigment to achieve target density.
Substrate. Non-absorbent films (PE, OPP, PET) require lower viscosity for even spreading and wetting. Porous substrates like paper can tolerate higher viscosity because the ink does not need to flow as freely across the surface.
Ink formulation. Pigment loading, resin type, and solvent blend all affect the baseline viscosity of the ink as supplied. A heavily pigmented ink will naturally run thicker than a light-tint or varnish-like formulation.
Every 30 minutes during a solvent flexo run:
Measure viscosity with the Zahn cup and record the reading.
If the reading has drifted more than 2–3 seconds from target, adjust with the recommended solvent and re-circulate for at least 5 minutes before re-measuring.
If you see a color shift mid-run:
Check viscosity first. Viscosity drift is the most common cause of color variation on a solvent flexo press, and it is the fastest variable to verify and correct.
If viscosity is on target and color still drifts, check anilox condition, doctor blade wear, and ink temperature.
If you see fill-in in reverses or dot gain:
Viscosity is likely too low. Measure and adjust upward by adding fresh ink or reducing solvent addition.
If you see plugged reverses, poor ink laydown, or excessive ink consumption:
Viscosity is likely too high. Add the recommended solvent in small increments and re-measure.
No. The correct viscosity depends on the ink formulation, the anilox volume, the substrate, and the press speed. A white ink on film and a black ink on paper will not share the same target. Always start from the ink supplier's recommendation and fine-tune on press.
Temperature is the single most important parameter for accurate viscosity measurement. A reading taken on cold ink will be higher than the same ink measured at working temperature. On a running press, the relationship is complicated by solvent evaporation: as ink temperature rises, solvent loss accelerates, which can push viscosity upward even though heat alone would normally thin a liquid. Measure at press temperature, not at ambient, and be aware that a rising temperature reading often signals that more solvent will be needed, not less.
Excessive solvent addition lowers viscosity below the functional range. The binder system may be diluted to the point where adhesion, rub resistance, and film formation suffer. The ink may also become too mobile, causing fill-in of fine details and inconsistent color. If you overshoot, add fresh ink to bring the viscosity back up — do not simply wait for evaporation, because that will change the pigment-to-binder ratio in ways you cannot predict.
FLEXO PRINTING MACHINE
FLEXO PRINTING MACHINE
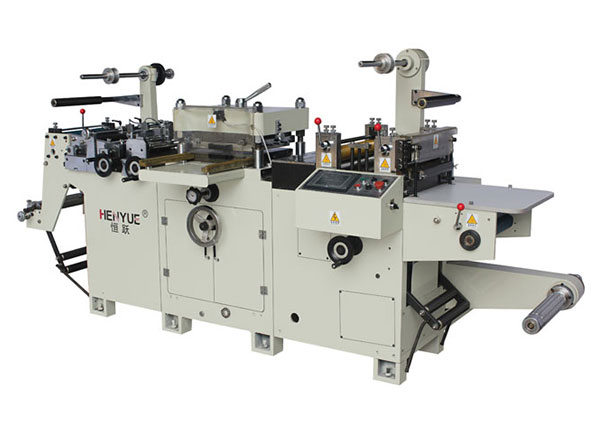
FLEXO PRINTING MACHINE
GET A QUOTE