 English
 Español
 عربي
عربي  Pусский
 Aug 26, 2026
Visit:4
Aug 26, 2026
Visit:4
Setting the doctor blade angle correctly is one of the most critical adjustments a flexo press operator can make. The angle determines how effectively the blade shears excess ink from the anilox roll—and it directly impacts both print quality and blade life. Too steep, and you risk ink starvation and rapid blade wear. Too shallow, and you’ll struggle with dirty print, excessive ink film, and even ink spitting.
So what’s the right angle? And how do you adjust it for different inks and conditions? This guide walks you through the fundamentals of doctor blade angle setting, with practical advice for pressroom operators.
In flexographic printing, there are two angles you need to understand:
Set Angle: The angle machined into the blade holder or chamber—this is the “no-load” angle.
Contact Angle: The actual angle at which the blade meets the anilox roll under pressure. This is the true ink-shearing angle.
The contact angle is always smaller than the set angle because blade loading causes deflection. When the blade is under pressure, it flexes, and the contact point shifts—reducing the effective angle. For example, a set angle of 31° can become a contact angle of roughly 18° under excessive pressure. That’s why you should always use the lightest pressure possible to achieve a clean wipe.
Both angles are measured off a tangent line perpendicular to the line between the roll center and the blade contact point.
The industry consensus—supported by the Flexographic Technical Association (FTA) and major blade manufacturers—is that the optimum contact angle range is 28° to 35°. Most modern flexo presses are automatically aligned to 30–35 degrees.
Within this range, the blade’s narrow metering edge can most efficiently wipe excess ink to form the desired surface ink film.
When the contact angle is too steep—greater than about 45°—several problems emerge:
Ink starvation: The blade scrapes too aggressively, removing more ink than intended. The anilox cells don’t get properly filled, leading to insufficient ink transfer and weak color density.
Excessive blade wear: A steep angle concentrates pressure on a smaller contact area, accelerating blade wear and shortening service life.
Anilox scoring risk: Too steep an angle increases the risk of damaging the ceramic coating on the anilox roll—an expensive repair.
Chattering: Steep angles are prone to vibration and chatter, which shows up as print streaks.
What to look for: If you notice weak color density, rapid blade wear concentrated at the tip, or chatter marks on the print, your angle may be too steep.
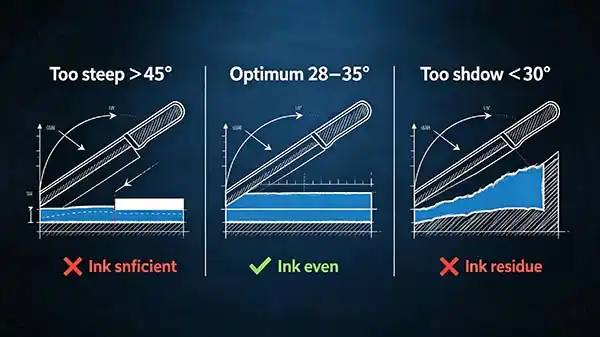
A contact angle that’s too shallow—below about 28°—causes a different set of issues:
Dirty print: The blade doesn’t wipe cleanly, leaving excess ink on the anilox surface. This results in dot gain, dirty print, and overall muddy appearance.
Wider contact area: A shallow angle creates a larger contact area between blade and roll. This wider contact is prone to hydraulic lift—ink builds up pressure and lifts the blade, allowing even more ink to pass through.
Ink spitting: At high speeds, shallow angles can cause ink to hydroplane behind the blade, leading to spitting and splatter.
Containment issues: Shallow angles compromise the seal between blade and roll, increasing the risk of ink leakage from the chamber.
What to look for: If you see dot gain, dirty print, ink spitting, or leaking end seals, your angle may be too shallow—or you may be running with excessive pressure that’s flattening the contact angle.
Key point: Many press operators increase chamber pressure to compensate for poor alignment or worn blades. This extra pressure flattens the contact angle, making the problem worse. When in doubt, reduce pressure and check the angle first.
Water-based inks have lower viscosity and higher volatility. They tend to dry quickly on the anilox and blade, so a slightly steeper angle helps ensure a clean, consistent wipe. The sharper shearing action prevents ink from drying and building up on the blade edge.
Blade recommendation: 0.006″ carbon steel or stainless steel blades work well
Key consideration: Water-based inks can be corrosive—stainless steel offers better corrosion resistance
Solvent-based inks fall in the middle range. A moderate angle provides good metering without excessive blade wear. Most standard press setups in the 35–40° range will perform well with solvent inks.
Blade recommendation: Standard steel or coated blades
Key consideration: Solvent evaporation can be an issue in open systems; enclosed chambers help maintain consistency
UV inks are thicker and more viscous than water-based or solvent inks. They exert higher hydraulic pressure against the blade. A slightly shallower angle—toward the lower end of the 30–35° range—helps reduce pressure and allows the thicker ink to pass through the cells more effectively.
However, UV ink also has a tendency to hydroplane behind the blade at high speeds. If you experience UV ink spitting, consider:
Using a stiffer, thicker blade
Ensuring the contact angle is at least 30°
Keeping pressure as low as possible while maintaining a clean wipe
Note: These are general guidelines. Your specific press, anilox specification, and print speed may require fine-tuning. Always consult your press manual and blade supplier for job-specific recommendations.
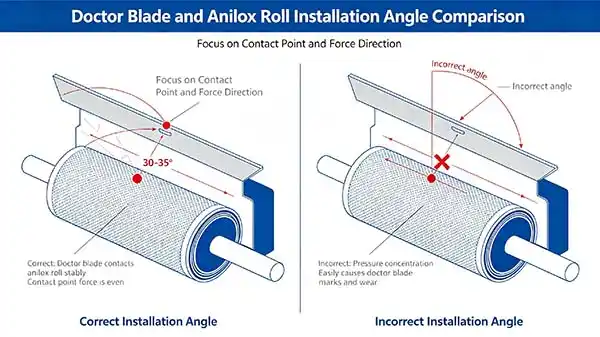
Most modern enclosed chamber systems have preset angles, but you still need to verify the angle and adjust when necessary—especially after blade changes or when switching ink types.
1. Prepare the press
Shut down the press and lock out/tag out per safety procedures
Clean the anilox roll and blade holder thoroughly
2. Loosen the blade holder/chamber mounting bolts
This allows you to pivot or adjust the blade assembly
On some systems, the chamber position is adjustable via eccentric cams or shims
3. Measure the current angle
Use a protractor-style angle gauge designed for doctor blade setting
Place the gauge as close as possible to the anilox roll surface
Slide the gauge until the protractor arm lies parallel to the blade or blade holder
Read the angle on the scale
If your press doesn‘t have a gauge, many blade suppliers offer simple angle templates or reference tools.
4. Adjust to the recommended angle
For most applications, aim for a set angle that yields a 28–35° contact angle under normal loading pressure
Remember: contact angle is always less than set angle. If your set angle is 31°, your actual contact angle may be closer to 18° under pressure. Use the lightest pressure possible to achieve a clean wipe.
5. Tighten and verify
Secure the blade holder/chamber bolts
Re-check the angle to ensure it hasn‘t shifted during tightening
6. Check blade-to-anilox contact
Run the press at slow speed with ink
Verify that the blade wipes uniformly across the full width of the anilox
Look for even ink film—no streaks, no dry spots, no excess ink
Parallelism: The blade must be parallel to the anilox roll axis. Even a 2° tilt can push the contact angle out of the acceptable range; a 5° tilt causes the side of the blade to meter instead of the tip.
Tighten from center out: When securing the blade, tighten screws from the middle toward both ends to prevent waviness.
Bevel orientation: The bevel edge of the metering blade should face away from the anilox roll.
Minimum pressure: Use the lowest chamber pressure that still achieves a clean, uniform wipe. This minimizes blade flex, extends blade life, and protects the anilox.
Here are the most common symptoms of incorrect blade angle—and what they tell you:
| Symptom | Likely Cause | What to Check |
|---|---|---|
| Uneven blade wear | Misalignment or skew | Check parallelism; verify blade is square to roll |
| Ink starvation | Angle too steep | Reduce set angle slightly; check pressure |
| Dirty print / dot gain | Angle too shallow | Increase set angle slightly; reduce pressure |
| Ink spitting | Angle too shallow, especially with UV ink | Increase angle to at least 30°; consider thicker blade |
| Chatter / streaks | Angle too steep | Reduce angle; check for vibration |
| Rapid blade wear | Excessive pressure or steep angle | Reduce pressure; verify angle |
| End seal leakage | Angle too shallow or excessive chamber pressure | Check angle; reduce pressure; inspect seals |
Experienced press operators know that used blades tell a story. The wear pattern on a used blade reveals a lot about pressure, alignment, and angle. If you’re troubleshooting persistent issues, send a set of used blades to your supplier for angle analysis. The contact surface—the worn area where the blade met the anilox—provides concrete evidence of what’s happening on press.
A: Ideally, yes—but in practice, you may need slight adjustments. The same angle range (28–35° contact angle) works across stations, but factors like ink type, anilox specification, and print speed can justify minor variations. Always verify each station individually, especially after blade changes.
A: Every time you change a blade. While the set angle in the chamber may stay consistent, blade thickness, bevel, and stiffness variations can affect the actual contact angle. Verify the angle after every blade change and during routine preventive maintenance—at least weekly for high-volume production. Also check parallelism every three to six months.
A: Absolutely. Too steep an angle concentrates wear on a smaller area, accelerating blade failure. Too shallow an angle increases the contact area and can cause uneven wear or chipping. Running at the optimum 28–35° contact angle—with minimum necessary pressure—maximizes blade life while maintaining print quality. Blade thickness and material also play a role; thicker, stiffer blades with beveled tips resist deflection and wear more evenly.
| Parameter | Recommendation |
|---|---|
| Optimum contact angle | 28–35° |
| Typical set angle | 30°+ |
| Water-based ink | 40–45° |
| Solvent-based ink | 35–40° |
| UV ink | 30–35° |
| Pressure | Lowest possible to achieve clean wipe |
| Check frequency | Every blade change; weekly during production |
The right doctor blade angle isn‘t just a number—it’s a balance between ink metering precision, blade life, and anilox protection. Keep your contact angle in the 28–35° range, use the lightest pressure possible, and verify alignment regularly. Your print quality—and your blade budget—will thank you. For equipment selection or technical consultation, please feel free to contact us.
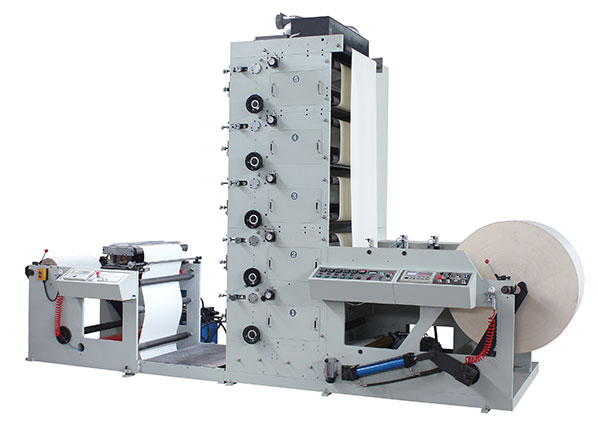
FLEXO PRINTING MACHINE
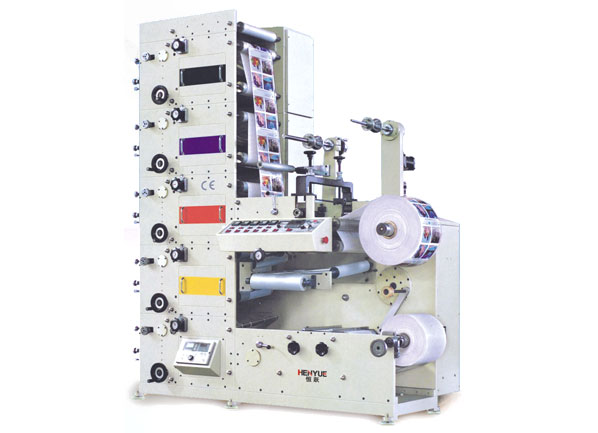
FLEXO PRINTING MACHINE
FLEXO PRINTING MACHINE
GET A QUOTE