 English
 Español
 عربي
عربي  Pусский
 Aug 19, 2026
Visit:227
Aug 19, 2026
Visit:227
Dot gain (also called tone value increase, or TVI) is the phenomenon where halftone dots printed on the substrate are larger than their intended size on the printing plate. In flexography, dot gain is not merely a defect—it is an inherent characteristic of the process. The question is not whether you have dot gain, but whether you can control it.
Dot gain stems from two sources:
Mechanical dot gain – caused by physical deformation of the plate dots under impression pressure. When the plate contacts the substrate, the soft photopolymer dots squeeze and spread.
Optical dot gain – caused by light scattering within the substrate. Ink penetrates the paper or film, and light is absorbed beyond the physical dot boundary, making the dot appear larger than it actually is.
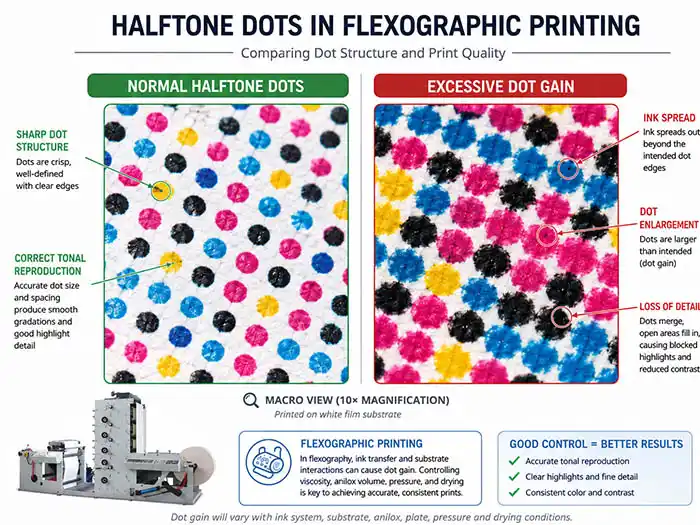
Excessive dot gain ruins highlight and shadow details: highlights plug and disappear, midtones become muddy, and shadows fill in solid. The goal is not to eliminate dot gain—which is impossible—but to bring it within a predictable, repeatable range that can be compensated for in prepress.
The most effective way to correct dot gain is to start with measurement. Without data, you're guessing. This article walks you through a systematic approach using a printed test form.
Before you can correct dot gain, you need to know what it is. Print a standardized test form that contains:
Tint patches from 1% to 100% – ideally every 5% through the midtone range, with finer increments in highlights and shadows. A typical test form includes measuring patches from 2% to 100% coverage.
A color control bar – for measuring density, trapping, and dot gain comparison at key tone values like 20/80% and 40/60%.
Diagnostic elements – such as fine lines, reverse text, and star targets to help identify specific print defects.
Grey balance patches – to check whether dot gain is consistent across all four process colors.
Critical rule: Expose and process the plate without any dot gain compensation curve applied. This gives you the "native" TVI of your press-substrate-ink combination. If you apply a compensation curve before fingerprinting, you're compensating for an unknown—and you'll never know your baseline.
Print the test form under your normal production conditions: same substrate, same inks, same press speed, same anilox rolls. If you fingerprint under ideal conditions that you never reproduce on a live job, the data is useless.
Once the test form is printed, measure the tint patches using a densitometer or spectrophotometer.
Key measurement considerations for flexo:
Use the Murray-Davies formula, which converts density readings into dot area percentage.
For densitometers, pay attention to settings: density status, backing material, polarizing filter, and dot gain formula all affect results.
A spectrophotometer provides more comprehensive data, including L*a*b* values and spectral data, which is increasingly preferred for G7 calibration.
Compare the measured dot area on the print against the nominal dot area on the plate. The difference is your dot gain at each tone value.
Example: If your 40% halftone patch measures 54% on the printed sheet, your dot gain is 14%.
Record the dot gain values across the entire tone scale—from highlights, through midtones, to shadows. These data points form your dot gain curve.
The shape of your dot gain curve tells you where the problem lies. Different patterns point to different root causes.
Most likely cause: excessive impression pressure.
When impression pressure is too high, the plate dots squeeze and deform physically. The midtones are the most sensitive because the dots are large enough to deform significantly but small enough that the deformation represents a large percentage increase.
Research shows that increasing impression pressure causes a significant rise in both solid density and tone gain due to improved—but excessive—ink transfer from plate to substrate. The amount of compression must be accurately controlled, as increasing the maximum printing pressure increases the dot area and the dot gain rate.
Most likely cause: excessive ink film thickness from the anilox roll, or ink that is too thin.
Highlight dots are small and fragile. If the anilox delivers too much ink, or if the ink is low in viscosity and spreads easily, these tiny dots will bridge and plug.
Uneven pressure across the plate can also create excessive dot gain in highlight areas, caused by the relief height difference between highlight and shadow areas.
Most likely cause: plate screen ruling (LPI) too high for the substrate, or anilox cell volume too high.
Shadow dots are close together. If the plate ruling is too fine for the substrate's surface characteristics, or if the anilox delivers too much ink, the gaps between shadow dots fill in completely. On film substrates, anilox volumes above 5.5 BCM for process work are a common culprit for shadow plugging.
Most likely cause: process variation—inconsistent impression, fluctuating ink viscosity, or temperature changes.
Inconsistent dot gain is a bigger problem than high dot gain. If the gain changes from job to job or during a run, no prepress compensation curve can fix it. You need to stabilize the process first.
Once you've identified the primary contributor, take targeted corrective action.
This is the single most important mechanical adjustment for controlling dot gain.
"Kiss impression" means the minimum pressure required to transfer ink cleanly from the plate to the substrate—nothing more.
How to set kiss impression:
Ensure the plate is fully inked before adjusting impression.
Bring the impression cylinder in slowly until the full image appears without skips or pinholes.
If the image skips in exactly the same spot on each repeat, the problem is ink starvation—increase anilox/inker pressure.
If it skips at random locations, you need more plate impression.
Once the image prints fully, stop. Any additional impression is "hammering" and will increase dot gain.
The impression pressure should always be slightly greater on the plate than on the anilox—this is the "kiss" concept.
Research confirms that using the smallest possible printing pressure is critical for controlling dot gain.
The anilox roll delivers a fixed ink film thickness, measured in BCM or cm³/m².
The rule: For process color work on film substrates, exceeding 5.0 BCM will cause dot gain to spike. For coated folding carton liner, specify anilox volumes in the 3.5–5.5 cm³/m² range.
General anilox volume guidelines by application:
Heavy lines & solids: 9.0–4.0 BCM
Line & type: 8.0–1.0 BCM
Vignettes of matched color: 3.6–2.0 BCM
Vignettes of process color: 2.8–0.9 BCM
If you're seeing high dot gain, especially in highlights and midtones, move to a lower-volume anilox roll. Also check that your anilox cells are clean—a partially plugged 4.0 BCM roll may perform like a 2.0 BCM roll, delivering uneven ink and causing dot gain instability.
Ink viscosity has a direct effect on dot gain.
Higher viscosity reduces dot gain—thicker ink spreads less. For UV flexo inks, dot gain decreases as viscosity increases from 600 to 2,000 cps.
However, there's a trade-off: higher-viscosity inks may not transfer as well at high press speeds or on certain substrates.
Practical guidance:
Typical flexo ink viscosity range: 18–25 seconds
If dot gain is excessive, increase viscosity by 5–10 seconds
If dot gain is acceptable but you need more ink coverage, consider other adjustments first
One study found that adding methoxypropanol to ink significantly reduced dot gain by 25% on imprints made with GTT rollers—though this is formulation-specific and not a universal solution.
If pressure and ink adjustments don't solve the problem, the issue may be in the plate construction.
Plate hardness: Harder plates deform less than softer plates, causing less dot squeeze during printing. For highlight and process printing, use harder plates. Research on self-adhesive materials confirms that harder plates with moderate screen rulings, printed at minimal pressure, provide the best dot control.
Mounting tape hardness: The tape's foam core acts as a precision shock absorber between the plate and cylinder. The compression behavior of the tape directly controls dot gain.
Guidelines for tape selection:
Soft/mid-soft grades: Best for high-resolution halftones and process printing—controlling dot gain and dampening vibration is the priority
Medium grades: Suit combination prints that mix solid coverage with screened areas
Hard/firm grades: Best for solid areas, especially at high speeds
The general matching rule: softer tape for harder plates, harder tape for softer plates.
If you're seeing inconsistent dot reproduction or gear marks that can't be traced to the press or plate, tape hardness is often the first thing to check.
Plate surface technology: Consider using flat-top dot plates, which are specifically designed to minimize dot gain. Technologies like MacDermid's LUX largely eliminate the need for bump curves and produce flat-topped dot shapes that improve print consistency.
What constitutes "acceptable" dot gain depends on your substrate, inks, and quality requirements. However, industry standards provide useful benchmarks.
ISO 12647-6, the international standard for flexographic process control, defines flexographic print targets with a maximum dot gain tolerance of ±5% at 50% tonal value.
For a 50% tone, typical flexo dot gain is 15–25%, depending on the anilox, plate, and impression.
Practical reference ranges:
40% patch: Dot gain of 9–17% is generally acceptable per ISO standards
Midtones: Target 15–22% dot gain for most commercial work
Highlights: Gain should be minimal—typically 3–8%
Shadows: Gain should taper off—ideally no more than 5–10%
A perfectly set press with good ink can achieve a deviation of ±1% from 2% to 95% coverage across all three chromatic colors. This is the ideal, not the norm, but it demonstrates what's achievable with proper process control.
Important: G7 methodology shifts the focus from dot gain curves to gray balance. Rather than targeting specific TVI values, G7 aims for near-neutral density across the tone scale. Many US and Canadian brand owners specify G7 alongside ISO 12647-6.
Yes. Dot gain can and often does vary significantly between CMYK colors. Different pigments have different rheological properties—some inks spread more than others. This is why you should measure and compensate each color separately. The ideal is to achieve similar dot gain curves across all four colors, since a neutral grey solid will only appear neutral when the dot gains of the three chromatic colors are similar.
Significantly. Substrate is one of the largest variables in dot gain. Porous, uncoated papers absorb ink and cause more dot gain than coated papers or films. Film substrates with low surface energy can cause ink to sit on the surface and spread. ISO 12647-6 specifies different TVI curves and targets across four substrate types: newsprint, uncoated, coated, and film. Always fingerprint each substrate separately—don't assume your compensation curve for coated paper will work on film.
Directly and significantly. The tape's foam hardness determines how much the plate compresses under impression. Too soft a tape allows excessive dot growth and loss of sharpness. Too hard a tape transmits rather than absorbs vibration, which can cause bounce artefacts or gear marks. The right tape hardness matches the job requirements: soft/mid-soft for halftone and process work, medium for combination prints, and hard/firm for solids. Matching tape thickness to plate hardness is also critical—harder plates match with thicker tape to relieve pressure impact and reduce dot gain.
Correcting dot gain on a flexographic press is not a one-time fix—it's an ongoing process of measurement, adjustment, and verification. The workflow is cyclical:
Print a test form without compensation curves
Measure the dot gain at all tone values
Diagnose the pattern
Adjust pressure, anilox volume, ink viscosity, or plate/tape selection
Re-measure to verify improvement
Apply compensation curves in prepress once the process is stable
Remember: inconsistent dot gain is the real enemy. If your pressroom operates consistently—measuring density, dot gain, and gray balance on every job—you can compensate predictably. If the problem changes on every job, you'll never know which way to adjust. For equipment selection and on-site support, contact our team.
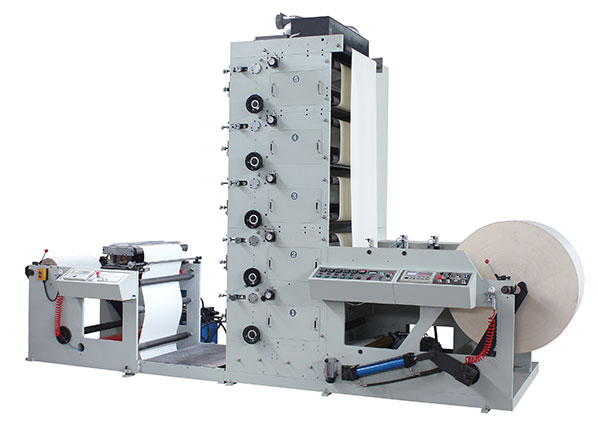
FLEXO PRINTING MACHINE
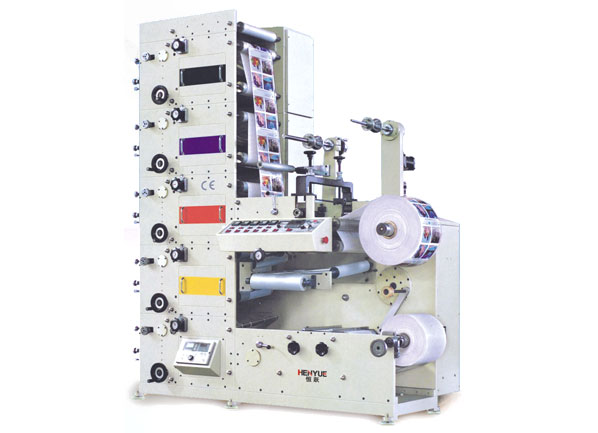
FLEXO PRINTING MACHINE
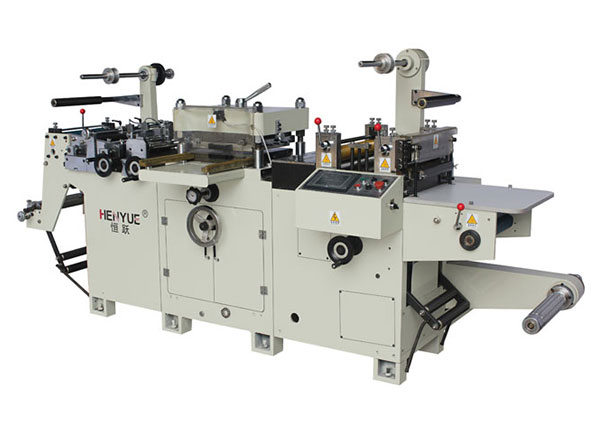
FLEXO PRINTING MACHINE
GET A QUOTE