 English
 Español
 عربي
عربي  Pусский
 Sep 22, 2026
Visit:4
Sep 22, 2026
Visit:4
Your press is running, the plate is clean, and the ink is fresh — yet the print looks weak, patchy, or washed out. Ink not transferring properly is one of the most common and frustrating problems in flexographic printing. It shows up as uneven density, missing dots, or an overall washed-out appearance that no amount of color adjustment seems to fix.
The good news is that the causes are almost always traceable. This guide uses a four-station diagnostic method — working from the anilox roll through the doctor blade, impression pressure, and substrate — so you can isolate the real cause instead of guessing. This is a practical solution for poor ink transfer in flexo printing that press operators and process engineers can apply job after job.
The anilox roll is the heart of ink delivery in flexo. Its engraved cells pick up a fixed volume of ink from the chamber and transfer it to the printing plate. When that volume drops for any reason, ink transfer suffers immediately. This is where many cases of ink transfer failure begin.
Clogged cells. This is the most overlooked cause. Dried ink, pigment buildup, especially titanium dioxide, and resin residues accumulate inside the cells over time. A roll that looks clean on the surface can still have partially blocked cells that reduce effective volume dramatically. In practical terms, a 4.0 BCM anilox roll can perform like a 2.0 BCM roll if the cells are partially plugged. That is a 50% loss in ink delivery capacity — enough to turn a full solid into a weak ghost of itself.
Worn cell walls. Doctor blade friction and abrasive inks slowly wear down cell walls, reducing the roll’s ability to hold its intended volume. A cell volume decrease of just 0.25 BCM — roughly 10% of a typical cell — is enough to visibly change color on press. Over months and years, this drift happens so gradually that operators compensate with press adjustments rather than identifying the roll itself as the culprit.
BCM mismatch. The engraved volume, measured in billion cubic microns, must match the ink film thickness your print job actually requires. BCM alone does not determine print density — machine characteristics, plate type, substrate, and ink formulation all interact — but a fundamentally wrong specification will make proper transfer impossible regardless of other settings.
Measure, do not eyeball. Visual inspection cannot tell you whether a roll is truly clean. Use 3D cell volume measurement or microscopy to verify that the effective volume matches the nominal specification.
Match the cleaning method to the contamination type. Ink and resin buildup responds to alkaline cleaners; coatings and adhesives need solvent-based products; mineral deposits require acid descaling. Severely blocked rolls may need ultrasonic or laser cleaning. For UV inks, clean after every job — UV residue hardens fast and becomes extremely stubborn once cured.
Verify BCM before every critical job. Keep a roll history log for each anilox and measure volume regularly. If the effective volume has dropped below the tolerance for the job, replace the roll or adjust the specification.
The doctor blade meters the ink film on the anilox surface. Its job is straightforward: remove all surface ink so that only the ink inside the cells transfers to the plate. When the blade fails at this task, ink metering becomes inconsistent, and transfer quality collapses. This is a common source of ink transfer failure that operators often misdiagnose as an ink or plate problem.
Worn blade edge. A dull or chipped blade cannot wipe the anilox cleanly. Excess ink remains on the roll surface, causing flooding on the plate and uncontrolled transfer. The result is often a dirty, mottled print rather than a clean image.
Excessive blade pressure. This is counterintuitive but critical: pushing the blade harder against the anilox does not improve metering. It makes things worse. When chamber pressure is too high, the blade flexes and planes over the ink film instead of shearing it cleanly. Ink collects on the containment blade — a condition known as back-doctoring — and metering becomes uneven.
Incorrect blade angle. The blade should engage the anilox at a precise contact angle, typically 30–35 degrees for modern flexo presses. If the angle drifts too low, ink passes under the blade; too high, and the blade scrapes aggressively, causing rapid wear.
Wrong blade thickness or tip profile. A blade that is too thick cannot conform to the anilox surface properly; a tip profile that does not match the line screen will leave streaks or miss cells entirely.
Replace the doctor blade at the first sign of wear — do not wait for visible print defects. Confirm that the blade material, thickness, and edge profile are correct for your ink system and anilox specification. Reset blade pressure to the minimum required for a clean wipe; in most modern chamber systems, this is lighter than operators expect. Work with your blade supplier to establish a documented maintenance schedule with checkpoints for blade wear.
Impression pressure controls the contact between the plate and the substrate, and separately between the plate and the anilox. Too little pressure means the plate does not make full contact — ink stays on the plate instead of transferring. Too much pressure deforms the dots, squeezes ink outward, and creates the paradox of heavy pressure producing weak transfer.
Insufficient impression. If the plate is not making complete contact with the substrate, you will see missing areas, especially in fine detail and halftones. This is most common when the impression has been backed off to control dot gain, or when the mounting tape has compressed over time.
Excessive impression. Heavy impression pressure deforms the raised image areas of the plate. On halftone dots, this causes dot gain and ink extrusion that makes the print look muddy rather than sharp. In solid areas, excess pressure can actually push ink out of the contact zone, reducing the effective film thickness transferred to the substrate.
Plate-to-anilox pressure. This is separate from the printing impression. If the plate is pressed too hard against the anilox, the plate’s raised areas are crushed and cannot accept ink properly. The recommended setting is the lightest possible contact that allows complete inking.
Set the printing impression to a kiss impression — the lightest possible contact that transfers ink to the substrate. The flat portion of the raised dot should just barely contact the substrate, without squeezing or deforming. Verify uniformity across the web width; uneven impression is a common cause of localized missing ink. If you are running thin plates on cushion mounting tape, lower pressure is achievable over a wider range of press settings because the cushion material absorbs more of the squeeze.
Even with perfect anilox, blade, and impression settings, ink cannot transfer evenly to a substrate that will not accept it. Surface energy and absorption characteristics determine whether the ink wets out and forms a continuous film or beads up and pulls away. Substrate absorption and surface energy are therefore critical variables in any ink transfer troubleshooting process.
Low surface energy on film. Untreated polyolefin films — PE and PP — have surface energies in the range of 28–32 dyne/cm, far below what most flexo inks require for proper wetting. If the ink’s surface tension is higher than the substrate’s surface energy, the ink will not wet out, and you will see pinholing, poor adhesion, and incomplete transfer.
Dyne decay. Even pre-treated films lose their treatment over time. Corona treatment introduces polar functional groups onto the film surface, but those groups decay — sometimes within days or weeks depending on storage conditions. A film that was treated at 42 dyne/cm at the extruder may be at 35 dyne/cm by the time it reaches your press.
Over-absorption on paper. At the other extreme, rough or highly absorbent paper can pull ink into the sheet so aggressively that the surface appears starved. Uncoated stocks with high porosity can consume far more ink than expected, making solids look weak even when transfer from the plate is correct.
Verify surface energy before the run. Use dyne pens or contact angle measurement to confirm the substrate is within the required treatment range for your ink system. For water-based and solvent-based flexo inks, PE and PP typically need 38–44 dyne/cm, while PET requires 44–52 dyne/cm.
Apply in-line corona treatment if needed. Even pre-treated films benefit from a bump corona treatment before printing. This re-establishes surface energy and eliminates the variability of dyne decay during storage. Printers running both solvent and water-based inks report fewer delays and less downtime on lines equipped with corona treaters.
Match the ink to the substrate. If corona treatment is not an option, select an ink formulation with lower surface tension that can wet out on the substrate’s actual dyne level. This is a compromise, not a fix, but it can keep a challenging job running.
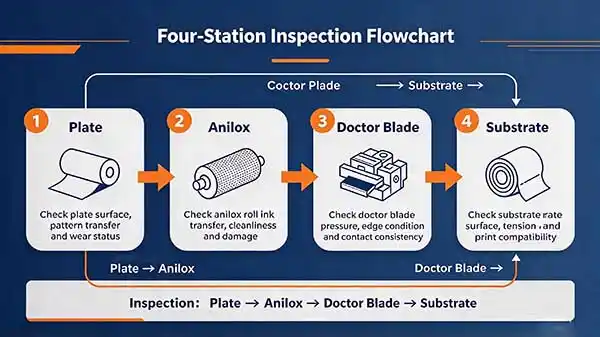
When you face poor ink transfer, work through the stations in this order:
Plate → Anilox → Doctor Blade → Substrate
Start at the plate because it is the easiest to inspect. Check that the plate is clean, undamaged, and properly mounted. A plate with dried ink on the surface or a lifted edge will prevent transfer regardless of other settings. Only after confirming the plate is sound should you move upstream to the anilox, then the doctor blade, and finally the substrate. This sequence avoids the common trap of adjusting impression pressure to compensate for a clogged anilox — an adjustment that masks the real problem and creates new defects.
| Observed Phenomenon | Priority Inspection Direction |
|---|---|
| Uniformly light ink across the print | Anilox roll BCM or doctor blade pressure |
| Partial ink missing | Clogged cells or uneven pressure |
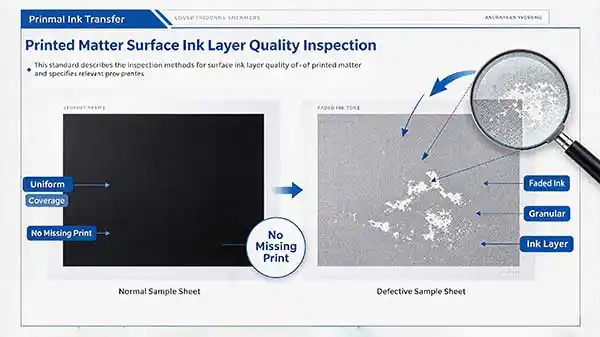
| Grainy ink layer | Viscosity or substrate issue |
Yes, significantly. Ink temperature directly affects viscosity, and viscosity determines how readily ink releases from the anilox cells and wets the plate. Research shows that flexo ink transfer is optimal at 25–30°C; above 30°C, transfer efficiency drops noticeably. On high-speed presses, the mechanical energy in the ink chamber itself raises ink temperature — sometimes by several degrees between the chamber entrance and the metering zone. Temperature control on the ink supply, not just viscosity measurement at the tank, is essential for consistent transfer.
Softer plates, with lower Shore A durometer, generally offer better ink transfer on rough or uneven substrates because they conform more readily to the surface. Lower durometer plates — in the 45–55 Shore A range — are commonly used for corrugated board, where surface roughness demands maximum conformity. Harder plates, typically 65–75 Shore A, provide better dot fidelity and are preferred for high-resolution process work on smooth substrates. The trade-off is real: a harder plate gives sharper dots but may struggle to transfer ink evenly to a textured surface.
It depends on which failure mode you mean. On film, the dominant issue is surface energy — untreated or decayed film has low dyne levels that prevent ink wetting, causing pinholing and adhesion failure. On paper, the issue is usually absorption: uncoated or highly porous stocks pull ink into the sheet, leaving the surface looking starved of ink. Both are transfer problems, but they require completely different solutions. Film problems are solved with surface treatment; paper problems are solved with ink formulation or substrate selection.
Poor ink transfer in flexo is rarely caused by a single catastrophic failure. It is almost always a gradual drift — an anilox that is slightly clogged, a blade that is slightly worn, an impression that is slightly too heavy, or a film that has slightly lost its treatment. The four-station diagnostic method gives you a systematic way to find the drift before it becomes a defect.
Start with the anilox. Confirm that the roll is delivering the volume it was specified to deliver. Then check the blade, verify the impression, and measure the substrate. In most cases, the answer is at Station 1 — a clean anilox with the correct BCM specification solves more ink transfer problems than any other single action. For related issues, also review ink starvation and pressure settings on press, since both can mimic or worsen poor ink transfer.
Sep 22, 2026
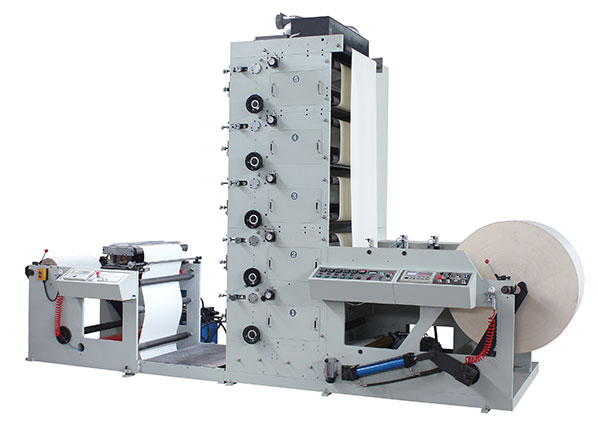
FLEXO PRINTING MACHINE
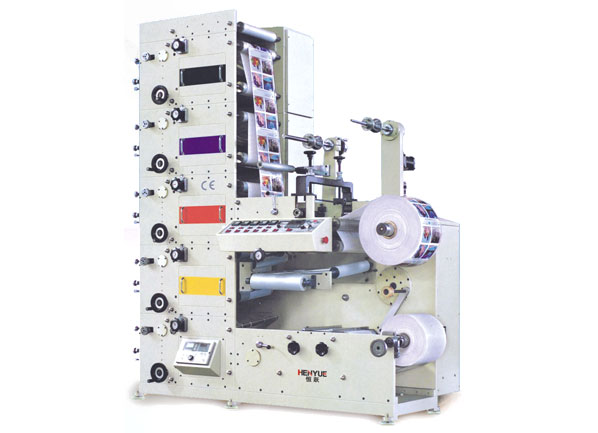
FLEXO PRINTING MACHINE
FLEXO PRINTING MACHINE
GET A QUOTE